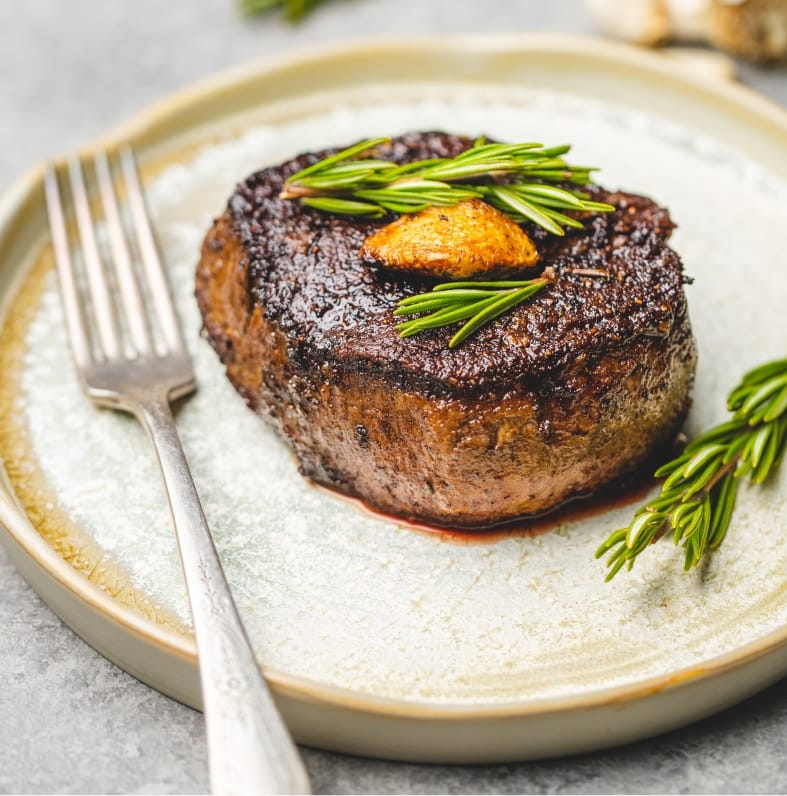
Searing meat is an essential technique every home cook should master. We will teach you how to sear meat Not only does it create a beautiful crust, but it also enhances the flavors and textures of the meat. Whether you’re preparing a steak, pork chop, or chicken breast, searing can take your dish to the next level. In this guide, we will walk you through the steps to achieve the perfect sear on your favorite cuts of meat.
Meats you can sear
There are different types of meats you can sear, including steaks, chicken, and even salmon. The goal of searing is to use high heat and fat to caramelize the outside of a protein. There are lots of differences of opinion on how to sear meat but the basics and fundamentals are the same.
The fact is there are different techniques and methods for searing meat but the fundamentals are the same, use high heat, fat, and time over a non-stick surface to create and nice seared crust on meat.

Equipment for searing meats
For searing meats, you can use either a cast iron skillet or a stainless still pan and even your grill. The type of equipment you use comes down to availability, taste, and personal preference. However, the basics still apply.
A cast iron pan will retain heat a lot longer but it takes longer to heat and tranfer heat. Meaning that if you if you raise our lower the tempture to manage the cooking, it will take longer for those changes to tranffers to the meat.
On the other hand, stainless steel pans will heat up very quickly and also loose heat very quickly. So change sin temperature can be felt faster but as the cook, you also have to react faster to temperature drips and spikes.
How to Sear Meat 1 O 1: The Steps
1. Choose the Right Cut of Meat
Not all cuts of meat are suitable for searing. Look for cuts that are tender and have a good amount of marbling, such as ribeye, sirloin, tenderloin, or chicken with nice skin. These cuts tend to cook quickly and develop a delicious crust when seared.
2. Dry the Meat
Before searing meat, remove the meats from the refrigerator allowing them to get close to room temperature.
Note: You don’t have to let the meats come up to room temperature, Remember that temperature control is one aspect of food safety, and exposing meats to temperatures in the danger zone can accelerate bacteria growth.
Pat the meat dry with paper towels. Moisture on the surface of the meat can hinder the browning process, so removing excess moisture is crucial. The meat will not start searing until that outside moisture is burned, delaying the searing process but also consuming heat from the cooking surface.
3. Preheat a Skillet
Using a heavy-bottomed skillet, preheat it over medium-high to high heat. Cast iron or stainless steel skillets work best for searing due to their excellent heat retention and heat transfer.
For some, a stainless steel pan will work best because they are lighter, making it easier to move around especially if you are doing some sort of braising where you need to move the pan around.
4. Add Oil and Heat
Once the skillet or pan is hot, add a high smoke point oil like canola, vegetable, or grapeseed oil. Swirl the oil to coat the bottom of the skillet evenly. Allow the oil to heat until it shimmers or starts to smoke slightly.
Too much smokes means the pan is too hot. Lower the heat before the next step. The oil should flow freely and ripple slightly.
5. Season the Meat
Season the meat liberally with salt and pepper or for better flavor use our steak seasoning blend Gypsy just before adding it to the hot skillet or pan. The high heat will help the seasoning adhere to the meat and enhance its flavor.
Is important to note that while sometimes is ok to season or apply rubs to meats a few minutes before cooking, for searing you want the meat to be as dry as possible. seasoning adds salt which draws moisture which will not help when quick learning and beats the purse of step two of this guide.
If you are using the reverse sear method is ok to season the meats a few minutes prior to get as much flavor as possible. but for quick searing in a skillet, the opposite works best.
6. Sear the Meat
Carefully place the seasoned meat in the hot skillet. It should sizzle immediately upon contact. Avoid overcrowding by keeping an eye on the temperature and carefully checking the meat for proper browning. Cook each side of the meat for a few minutes until it develops a caramelized crust and reaches the desired donees internal temperature.
Also, remember that you are using hot oil and therefore always place the meat on cooking surface laying it away from you.
7. Flip and Finish in the Oven (Optional)
If you’re working thicker cuts of meat, you might want to finish cooking them in the oven. After searing both sides of the meat, transfer it to a preheated oven (350°F to 450°F) and cook until the desired internal temperature is reached.
8. Rest and Serve
Allow the seared meat to rest for a few minutes before slicing or serving. This resting period allows the juices to redistribute, resulting in a more tender and flavorful final product.
Serve your perfectly seared meat with your favorite sides and enjoy!
Final Thoughts
Remember, practice makes perfect when it comes to searing meat. Experiment with different cuts, seasonings, and cooking times to find your preferred level of doneness and crustiness. With time and experience, you’ll become a searing expert, impressing family and friends with your deliciously seared creations. Happy cooking!


